
Homemade Garlic Bread carries a kind of kitchen magic that instantly transports me back to childhood dinners at my grandmother’s table. She had a way of making even the simplest dishes feel extraordinary, and her garlic bread was no exception. I remember standing on a stool beside her, watching as she mixed softened butter with freshly minced garlic and chopped parsley—no shortcuts, no garlic powder, just the real stuff. She’d slather it generously over thick slices of crusty Italian bread, then slide them into the oven until the edges were golden and the kitchen smelled like heaven.
Unlike the store-bought kind, which always tasted a bit bland or soggy to us, her homemade version was full of personality—crisp on the outside, soft and buttery in the middle, and packed with the kind of flavor that only comes from real ingredients and a loving hand. It wasn’t just a side dish—it was a ritual, part of every pasta night or impromptu family gathering.
In this article, I’ll show you how to make garlic bread the way she taught me—simple, bold, and unforgettable. We’ll walk through the best bread to use, how to balance the garlic and butter just right, and ways to customize it with cheese, herbs, or even a hint of spice. Once you’ve had it homemade, you’ll never want to go back.
Table of Contents
Table of Contents
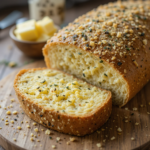
Homemade Garlic Bread
Description
Homemade Garlic Bread carries a kind of kitchen magic that instantly transports me back to childhood dinners at my grandmother’s table. She had a way of making even the simplest dishes feel extraordinary, and her garlic bread was no exception.
Ingredients
Ingredients
-
- 1 loaf French bread or Italian baguette (about 12–16 oz)
-
- ½ cup (1 stick) unsalted butter, softened
-
- 4–5 cloves garlic, minced (or 1 tsp garlic powder)
-
- 2 tbsp fresh parsley, finely chopped
-
- ¼ cup grated Parmesan cheese (optional)
-
- ½ tsp salt (or to taste)
-
- ¼ tsp black pepper
-
- ¼ tsp red pepper flakes (optional, for heat)
Equipment Needed
-
- Mixing bowl
-
- Chef’s knife & cutting board
-
- Baking sheet
-
- Aluminum foil (optional)
Instructions
Step-by-Step Instructions
1. Prep the Bread
- Preheat oven to 375°F (190°C).
- Slice the bread lengthwise (for softer garlic bread) or into 1-inch thick slices (for extra crispy edges).
2. Make the Garlic Butter
- In a bowl, mix softened butter, minced garlic, parsley, Parmesan, salt, and pepper until well combined.
3. Spread the Butter Mixture
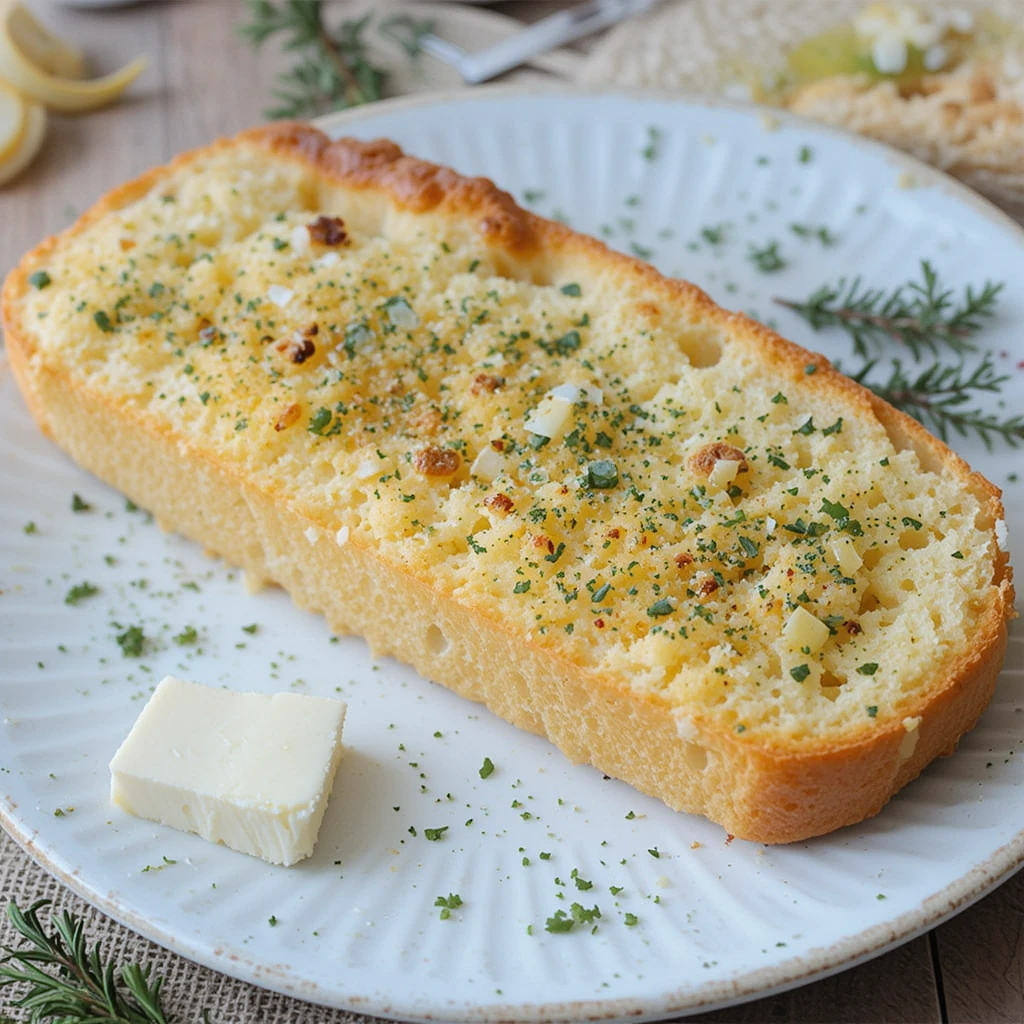
- Generously spread the garlic butter on both halves of the bread (or on each slice).
- For extra richness, drizzle with a little olive oil before baking.
4. Bake to Perfection
- For Soft Garlic Bread: Wrap in foil and bake for 10-12 minutes, then unwrap and broil for 1-2 minutes for a golden top.
- For Crispy Garlic Bread: Place directly on a baking sheet and bake for 12-15 minutes until golden brown.
5. Serve & Enjoy!
- Slice and serve warm. Garnish with extra parsley or Parmesan if desired.
The Cultural History of Homemade Garlic Bread
Understanding its origins adds appreciation:
- Italian roots in bruschetta traditions
- French influence from pain à l’ail
- American adaptation through Italian immigrants
- Evolution in diners and family restaurants
Check out this Easy Side Salads
Modern Interpretations
Contemporary chefs are reinventing garlic bread:
- Deconstructed versions with garlic foam
- Gluten-free and keto adaptations
- Sweet versions with roasted garlic and honey
- Bite-sized crostini variations
Pairing Principles
What to serve with your Homemade Garlic Bread masterpiece:
- Wine: Buttery Chardonnay or acidic Pinot Grigio
- Beer: Malty amber ales or crisp pilsners
- Cocktails: Bloody Marys or garlic-infused martinis
Check out this Watermelon Ice Cream
Why Homemade Always Wins
1. Unbeatable Freshness & Texture
Pre-packaged garlic bread often suffers from uneven butter distribution, stale bread, or an overly greasy finish. When you make it at home, you control every element:
- The bread stays crisp on the outside and soft inside.
- The garlic is freshly minced for maximum flavor.
- The butter is perfectly spread, ensuring every bite is rich but not soggy.
2. Total Customization
Store-bought garlic bread comes in limited flavors, but Homemade Garlic Bread lets you tailor it exactly to your taste:
- Garlic lovers? Add extra cloves or roasted garlic for depth.
- Herb-infused? Mix in fresh parsley, basil, or rosemary.
- Cheesy? Top with mozzarella, Parmesan, or even a blend of cheeses.
- Spicy? A dash of red pepper flakes or chili oil adds heat.
3. Quicker Than You Think
Many assume homemade garlic bread is time-consuming, but in reality:
- Prep takes just 5 minutes (mix butter, garlic, and herbs).
- Baking requires 10-15 minutes—faster than waiting for delivery!
- No special skills needed—just spread and bake.
4. Versatile for Every Meal
Homemade Garlic Bread isn’t just for Italian nights. It’s a universal side dish that complements:
- Pasta dishes (spaghetti, lasagna, or alfredo).
- Soups & stews (perfect for dunking).
- Appetizers (serve with marinara or spinach dip).
- BBQs & cookouts (a flavorful alternative to plain rolls).
Secrets to the Best Homemade Garlic Bread
Even a simple recipe benefits from a few expert tricks:
- Use room-temperature butter—softens easily and spreads evenly.
- Fresh garlic is non-negotiable—jarred garlic lacks depth.
- Don’t skimp on the fat—butter (or olive oil) keeps it moist.
- Broil at the end—for a crispy, golden finish.
- Serve immediately—garlic bread is best hot and fresh.
Beyond the Basics: Creative Twists
While classic Homemade Garlic Bread is always a winner, experimenting with flavors keeps it exciting:
- Cheese-Stuffed – Add a layer of mozzarella between bread halves before baking.
- Pesto Swirl – Mix pesto into the butter for an herby twist.
- Everything Bagel – Sprinkle with everything seasoning for extra crunch.
- Sweet & Savory – A drizzle of honey balances the garlic’s sharpness.
Classic Homemade Garlic Bread Recipe
Ingredients
- 1 loaf French bread or Italian baguette (about 12-16 oz)
- ½ cup (1 stick) unsalted butter, softened
- 4-5 cloves garlic, minced (or 1 tsp garlic powder)
- 2 tbsp fresh parsley, finely chopped
- ¼ cup grated Parmesan cheese (optional)
- ½ tsp salt (or to taste)
- ¼ tsp black pepper
- ¼ tsp red pepper flakes (optional, for heat)
Equipment Needed
- Mixing bowl
- Chef’s knife & cutting board
- Baking sheet
- Aluminum foil (optional)
Step-by-Step Instructions
1. Prep the Bread
- Preheat oven to 375°F (190°C).
- Slice the bread lengthwise (for softer garlic bread) or into 1-inch thick slices (for extra crispy edges).
2. Make the Garlic Butter
- In a bowl, mix softened butter, minced garlic, parsley, Parmesan, salt, and pepper until well combined.
3. Spread the Butter Mixture
- Generously spread the garlic butter on both halves of the bread (or on each slice).
- For extra richness, drizzle with a little olive oil before baking.
4. Bake to Perfection
- For Soft Garlic Bread: Wrap in foil and bake for 10-12 minutes, then unwrap and broil for 1-2 minutes for a golden top.
- For Crispy Garlic Bread: Place directly on a baking sheet and bake for 12-15 minutes until golden brown.
5. Serve & Enjoy!
- Slice and serve warm. Garnish with extra parsley or Parmesan if desired.
5 Garlic Bread Variations to Try
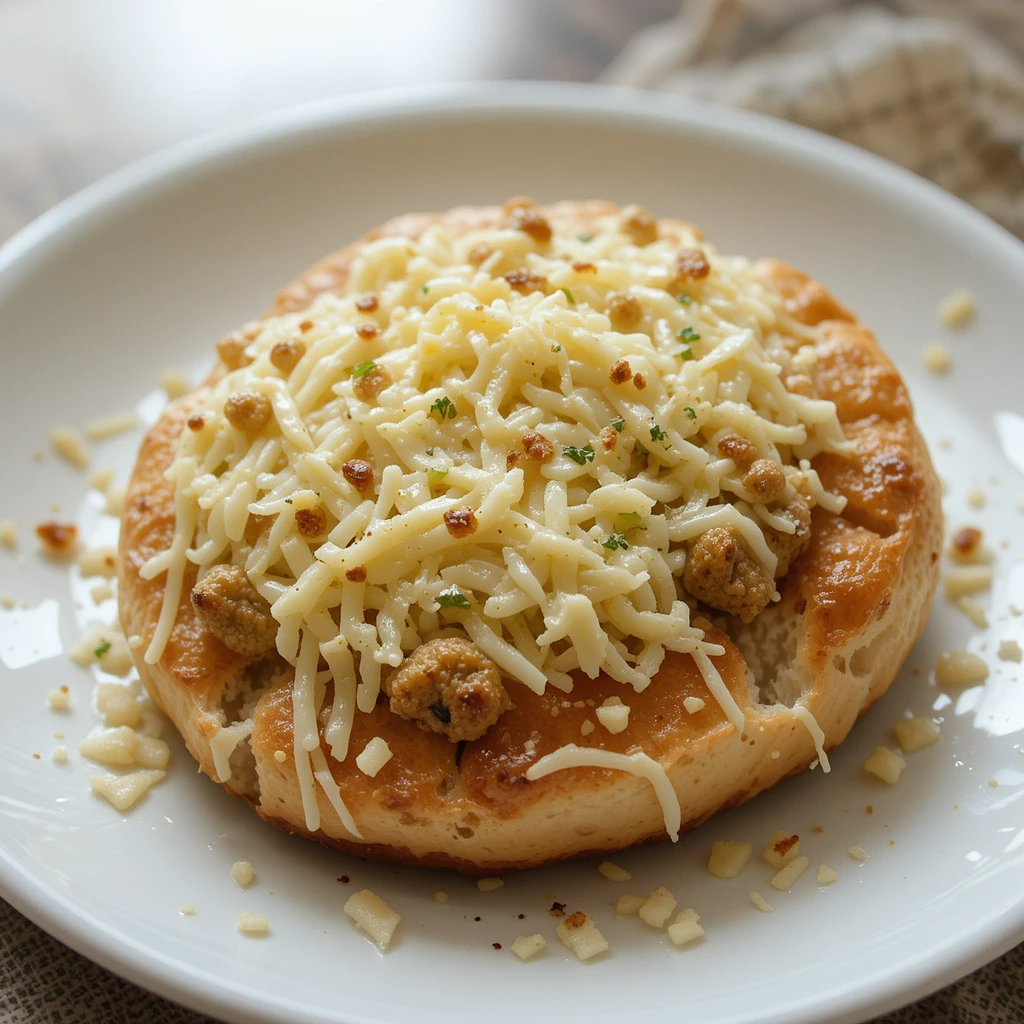
1. Cheesy Garlic Bread
- Add ½ cup shredded mozzarella or cheddar on top before baking. Broil for the last 2 minutes for a bubbly, golden crust.
2. Spicy Garlic Bread
- Mix in ½ tsp cayenne pepper or 1 tbsp chopped jalapeños for a kick.
3. Herb & Lemon Garlic Bread
- Add 1 tsp lemon zest + 1 tbsp fresh basil or oregano for a bright, herby twist.
4. Roasted Garlic Bread
- Replace minced garlic with 4-5 cloves roasted garlic (sweet, caramelized flavor).
5. Vegan Garlic Bread
- Use vegan butter + nutritional yeast instead of Parmesan.
Mastering the Art of Homemade Garlic Bread: Pro Tips & FAQs
The Science Behind Perfect Garlic Bread
Creating exceptional garlic bread isn’t just about following a recipe – it’s about understanding the culinary principles that transform simple ingredients into something extraordinary. Here’s what every home cook should know:
Choosing Your Ingredients Wisely
- The Bread Matters More Than You Think
- Crusty artisan breads with open crumb structures (like ciabatta or baguette) absorb butter beautifully while maintaining texture
- Sourdough adds delightful tang that complements the garlic
- Whole grain varieties offer nuttiness but may require extra butter
- Butter: The Flavor Conductor
- European-style butters (with higher fat content) create richer results
- Salted vs unsalted: chefs prefer unsalted for better flavor control
- Clarified butter can prevent burning at higher temperatures
- Garlic Preparation Techniques
- Microplaning garlic creates a paste that distributes evenly
- Roasting garlic beforehand mellows its bite
- Garlic confit offers sophisticated depth of flavor
Professional Techniques for Superior Results
The Butter Application Method
Restaurant chefs use these tricks for perfect coverage:
- Brush melted butter between slices before spreading garlic mixture
- Use a pastry brush for even distribution
- For extra crispness, butter both sides of each slice
Temperature Control Secrets
- The Two-Stage Baking Process
- Start at 350°F to melt butter into bread
- Finish at 400°F (or broil) for perfect browning
- Rotate pan halfway for even coloring
- The Foil Trick
- Wrap in foil for first 10 minutes to steam interior
- Uncover to crisp exterior
- Creates ideal textural contrast
Advanced Flavor Pairings
Move beyond basic Homemade Garlic Bread with these gourmet combinations:
Umami Boosters
- Anchovy paste in the butter
- Mushroom powder
- Parmesan rind infusion
Herb Infusions
- Steep rosemary in warm butter
- Blend fresh herbs into compound butter
- Finish with herb oils
Unexpected Twists
- Miso-garlic butter
- Truffle salt finish
- Calabrian chili oil drizzle
Storage & Reheating Like a Pro
Make-Ahead Strategies
- Freeze unbaked, buttered loaves wrapped in parchment
- Vacuum seal for longer storage
- Butter can be frozen in logs for easy slicing
Reviving Leftovers
- Spritz with water before reheating to prevent drying
- Use pizza stone for even reheating
- Refresh in air fryer for 2 minutes at 350°F
Troubleshooting Common Issues
Problem: Soggy Bread
Solutions:
- Toast bread lightly before buttering
- Add bread crumbs to butter mixture
- Use less liquid in garlic preparation
Problem: Burnt Garlic
Solutions:
- Add garlic in two stages (some mixed in, some sprinkled)
- Use garlic powder for topping
- Cover with foil during initial baking
Problem: Uneven Browning
Solutions:
- Rotate pan multiple times
- Use convection setting if available
- Brush with egg wash for even coloring
Homemade Garlic Bread FAQs – Your Questions Answered!
1. Can I use garlic powder instead of fresh garlic?
Yes, you can substitute garlic powder, but fresh garlic provides a stronger, more aromatic flavor. If using powder, mix about ½ teaspoon per clove of garlic called for in the recipe. For the best taste, consider using both fresh garlic and a pinch of garlic powder for extra depth.
2. What’s the best bread for Homemade Garlic Bread?
The ideal bread is crusty on the outside and soft inside, like a French baguette, Italian loaf, or ciabatta. These types hold up well to the butter mixture and crisp nicely when baked. Avoid pre-sliced sandwich bread, as it can become soggy or too soft.
3. Can I make Homemade Garlic Bread ahead of time?
Absolutely! You can prepare the garlic butter mixture in advance and store it in the fridge for up to 3 days or freeze it for longer storage. When ready to serve, spread it on the bread and bake. You can also assemble the garlic bread (unbaked) and refrigerate it for a few hours before baking.
4. How do I store leftovers?
Wrap leftover Homemade Garlic Bread in foil and keep it at room temperature for up to 1 day or refrigerate for 2-3 days. To reheat, place it in a preheated oven (350°F/175°C) for 5-10 minutes to restore crispiness. Avoid microwaving, as it can make the bread soggy.
5. Can I freeze garlic bread?
Yes! For best results, freeze unbaked Homemade Garlic Bread. Wrap it tightly in foil or plastic wrap, then place it in a freezer bag. When ready to bake, cook it straight from frozen, adding 5-10 extra minutes to the baking time. You can also freeze baked garlic bread, but it may lose some crispiness upon reheating.
Final Thoughts
Homemade garlic bread is a simple yet irresistible side dish that takes meals to the next level. With endless variations and minimal effort, it’s a must-have recipe for every home cook.
Ready to bake? Your next pasta night just got even better! 🍞🧄🔥
Would you like any adjustments or additional sections?